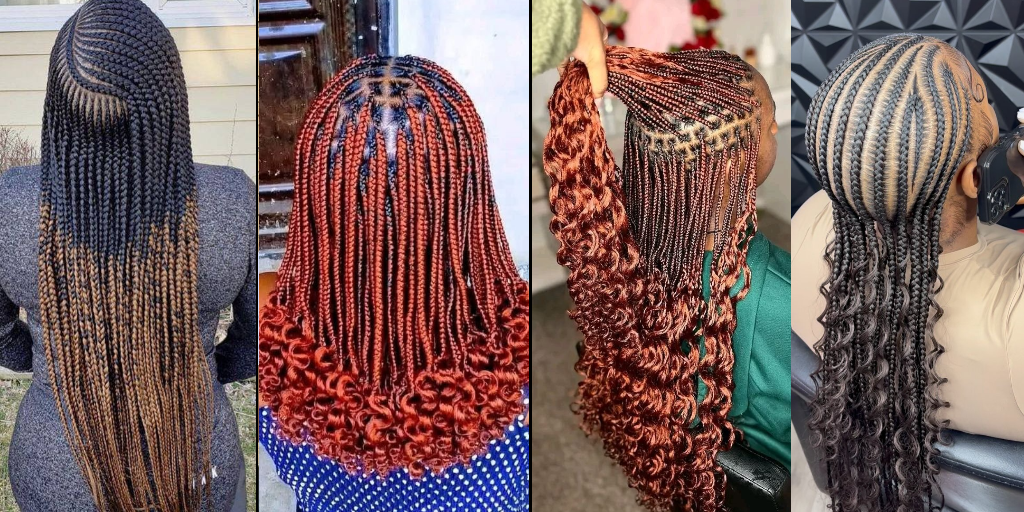
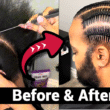
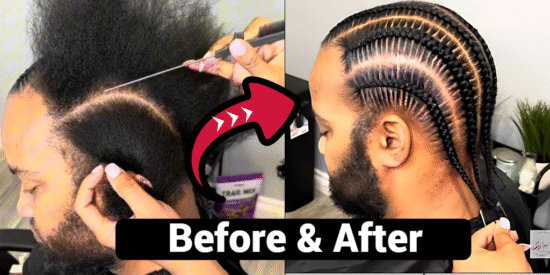
I’ve been doing Stitch braids for about six years now therefore I have this confidence sharing my experience on Stitch Braiding for Men. I will reveal the Details to make it convenient for you to understand. This hairstyle is also Perfect for Short or Long Hair. Also, you will learn How to Keep the Cornrows Stitch Hairstyles Fresh.
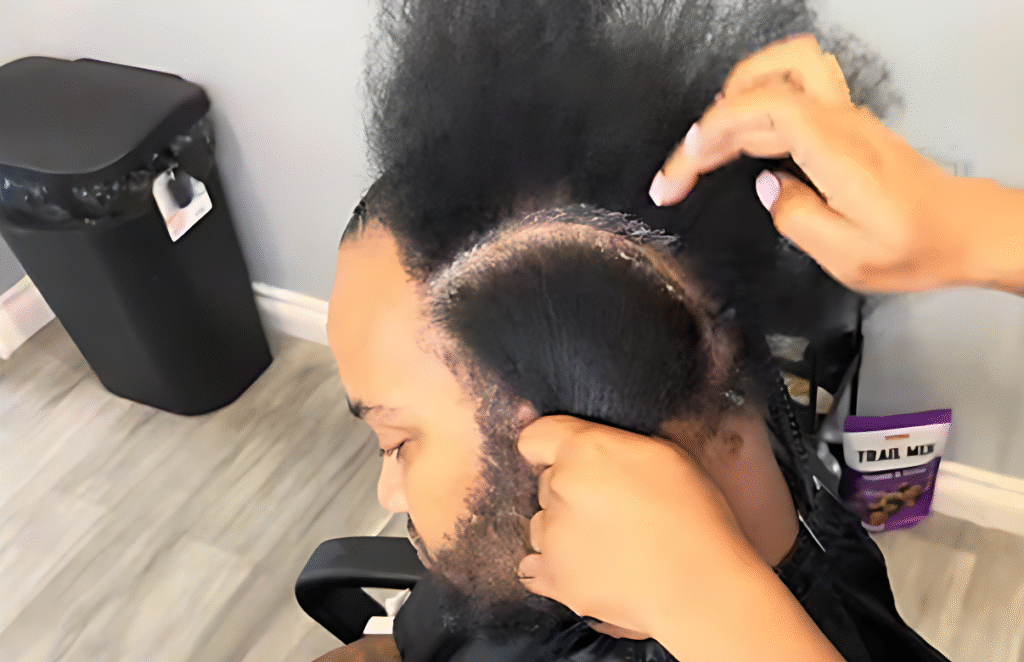
Firstly, wash the hair thoroughly and apply any of your prevent shampoo or gel and cream. Apply it on both sides of the sections. When the products are well applied, it makes the hair smoothe and flexible when braiding or twisting.
There are many other notable parting method you can but I will use only one of them that is rattail comb and light jam. Why this method works well for me? Because it makes the pattern clean.
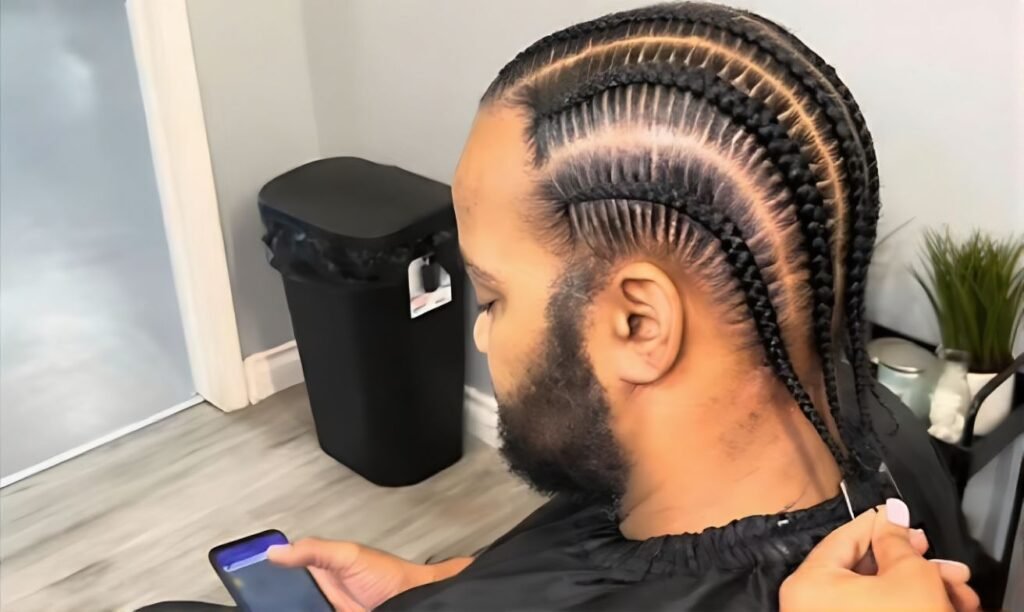
The Parting method that I use is a rattail comb and a light Jam. This help in cleaning the parts patterns. The list of all the products needed for this stitch braids are listed below
Rat tail and all-purpose comb set, Neat Braid Gel, Mint Scalp Oil
The Stitch Braid Method: Molding and Smoothing
Use the principle of ” The better judgment” when servicing a clients it guide you to know what’s too much and what’s not enough when applying products.
Saturate the hair enough so that it stays in place when you are creating your stitches but don’t use too much product where the braid is slipping or you can’t get a good enough grip.
Comb the product through then use the back of the comb to start smoothing the hair down and there’s no right or wrong amount of time to do this you just need to do it until you get the hair as smooth and seamless as possible.
This also ensures that once you start braiding, you don’t necessarily have to smooth any hair down you can just keep stitching and keep going with the braid. Continue to smoothen the hair backwards.
Stitching and Technique
The rat tail comb helped me to section my hair very good so I recommend trying it yourself.
Take your time when you’re braiding because you want to get the method down packed before you focus on your speed. The speed will come you need to get the method down packed and then you’ll worry about the speed later.
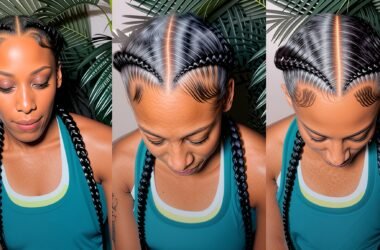
Create the stitches with the comb because it pulls the hair a little tighter for especially in the front and the middle section of hair where it’s a little bit more thick. Maintain the styles or the design on both side to avoid inconsistency. Use comb to section the hair.
Comfortably hold the comb in both hands and alternate but do make it known that you have to do what’s comfortable for you because at the end of the day you have to be comfortable so that you are providing the best work that you’re able to give.
Create a Parting to stitch one side. Divide one side of the hair. hold it and pass the comb through it. Switch the tools and also divide other part the same as the first to create balanced section.
Note: During your grooving (parting) make sure that the lines are straight from the front to the back.
Use your Pink Finger. Pink finger is the small thumb that comes before the ring finger. It is used to create sections, partings, and mostly used in stitch braiding. After using the pink finger, their wouldn’t be a need for a rat-tail comb again because their will be enough grip in the hair. Now, switch the comb and the hand over and repeat it on the other section.
Apply any of the proffered cream to the sections. Make sure that you are using product throughout the braid because you don’t want it to be sleek on one area and then fuzzy at another portion of the braid.
Review and Final Styling
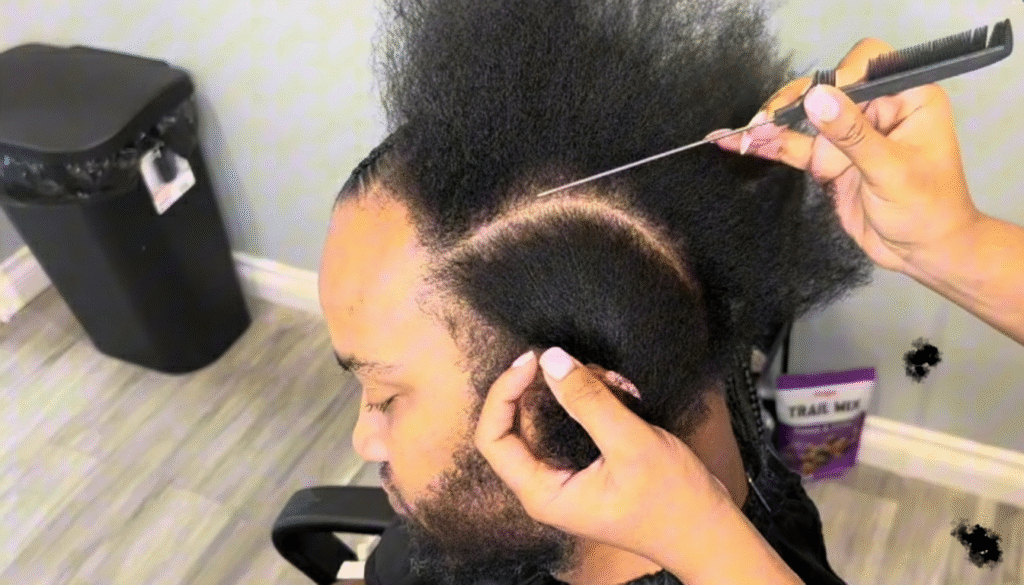
Apply the product you are using like the braiding gel, pomade or edge control on the section you will braid. Now, use the rat-tail to spread the product evenly on the hair. Start with the braiding, continues molding the hair to the exact styles or designs you aim.
Note: During this process, if the comb snag(uneasy flowing of comb through the hair), then add small amount product to lubricate the friction for easy combing. Continue with the until the hair starts shinning after the products application.
Use styling foam some call it foam mouse. This is because one of the best tool for smoothe. finishing is foam mouse. for better results. Dry the hair using blow dryer which take about 5 to 15 minutes or leave it to dry with natural heat which takes about 1 to 1 1/2 minutes.
How to Keep Cornrows Looking Fresh
I will be teaching you how to keep your cornrows looking clean and fresh if you’ve ever dealt with cornrows after a week or two of having them, they get all crazy fuzzy. They all messed up and don’t know what to do. I’m going to be solving that issue for you so be sure to take your pen and paper for notes.
Now this is going to be a morning and a night routine and there’s a couple of things that you’re going to need to do this.
1. Good hair oil.
This helps in moisturing the hair to enhances its softness and add more slip or lubrication it when combing. you don’t want to put any sort of water in your braids you don’t want to put any sort of conditioner you want to manly moisturize your braids with oils now all these oils are going to be honorable mentions if you don’t already have a solid one that you’re using.
Styling Mouse or Hair Mouse
You can use the one that I’m going to use in write about or if you have your own you can use that as well just make sure it’s going to be a good hair mousse.
Doo-rag or Durag.
Do-rag is going to be a very important step because this is how you’re going to lay your hair or your braids down and prevent your braids from continuously being fuzzy.
Step 1: Moisturizing the Scalp and Hair (Oil Application) What we’re going to do is we’re going to start off by moisturizing our braids.
Applying Oil to the Scalp:
We’re going to apply our oil I’m going to be using this one here we’re going to apply our oil in between each and every one of our parts here so you’re just going to work the oil through the very front of your scalp all the way to the back.
You want to make sure you’re applying that in between each and every one of your individual braids so that part that part piece of your scalp that you can see you’re applying the oil all the way from front all the way to the very back of your braids now applying that oil is going to help to moisturize your scalp.
Working Oil into the Braids:
Now you’re going to take your pinky here and you’re going to run your pinky from from the very front of your part to the very back of your part.
Right after that you’re going to take that or you’re going to start to work it into the actual braid so this is going to be a very important part because you want to make sure your hair is actually moisturizing your scalp is also actually moisturized so you’re going to work that into each and every one of your braids.
Technique Tip for Gentleness:
I’m trying to get that moisture into my scalp into the hair I’m trying to get it to the roots there and you can also see me taking my sweet time and being very gentle here because again if you’re too rough it can actually upset the hair and cause your hair to actually be more frizzy.
You’re going to be gentle you’re going to take your time and you’re going to work that slowly and lightly while I’m using your pinky hair so that you’re using as little pressure as you can.
Step 2: Styling Mouse or Mouse Application
By using the mouse, it controls all the downflyer and frizz at the same time. it also add hydration that makes it look smoothe and consistent
Application Method:
The way you’re going to apply this is you’re going to apply it directly to the braid and you’re going to apply it in a squeezing motion so you’re actually going to squeeze the braids lightly and have it absorb the mousse.
It’s going to absorb the moisture that’s going to be a lot better than just running it through your braids it’s going to irritate your braids and cause more frizz.
So mousse is basically pretty sticky it’s like a sticky it’s a sticky consistency so it definitely helps to hold and bend the hair together so that’s why we’re applying it here.
Uses of Setting Mouse
1. It is use when the hair is frizzy. This is when the hair texture is poor or when the hair strands refuse to align with each other. Its also an usual separation of hair from each other as a result of hair breakage or inappropriate hair products application.
And also, It sometime caused by extremely high or inadequate usage of product for long time. Setting mouse is used to soften the hair for quality texture.
2. When you are at a point where your braids are downy. You can rejuvenate them or give them a little bit more of a fresher look by applying mousse.
3. When the hair is not silky but you’re trying to prevent it from being wooly and it’s time to moisturize then I highly recommend using setting mousse.
About a month and a half ago, my own braids starts to get a bit frizzy, I was disturb because I knew I was not exposing my hair to any hash weather conditions.
With feather enquiries and responses from friends before I got to know that less or over usage of these products can cause hair frizz, then I admit my defeats.
Now I have learnt from a hard way to regulate my products usage. I begin treating my hair starting with oil for the two weeks. After that, my hair’s start getting a little velvety.
When I start to do the mousse process here, I will do oiling on my scalp and moisturizing my braids and then around two weeks, three weeks, and maybe four that’s probably when I want to applying setting mousse or laying the hair down with mousse.
Step 3: Setting the Style (Doo-rag)
When you have your mousse you can applied either blow dry or just let it air dry by itself.
Apply the doo-rag. Use the Durag to lay the hair down. It mat the hair to stick to the actual braids.
After it is applied, leave it about 15 to 30 minutes. You can blow it with hand dryer.
This is how you can keep your beautiful cornrow stitch to continue looking fresh and with good smell.