Hello everyone, if you are reading this blog, the mean you want to learn How To Style Fulani Boho Hair For Beginners using Natural Conditioner. I will also guide on On what to do after you undo the Fulani Boho braids either for yourself or for a client.
Many hair became frizzi after undoing their lovely hairstyles. So, I made it possible for you to go by the best treatment to keep your natural hair fresh and clean using deep conditioning without using water.
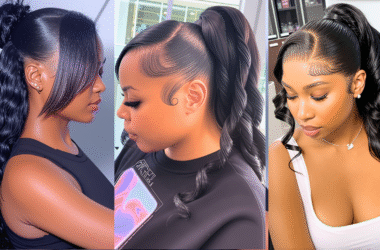
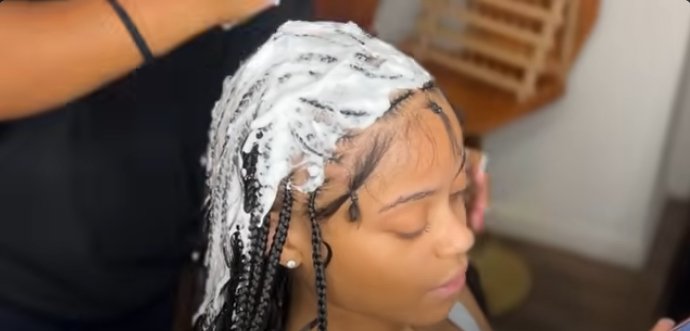
Below is the natural hair with no extension or secondly attachments. Now, lets dive into it.
This is how the hair looks like before the retouch will begin and also applying the necessary products. This is row, no extension is added yet
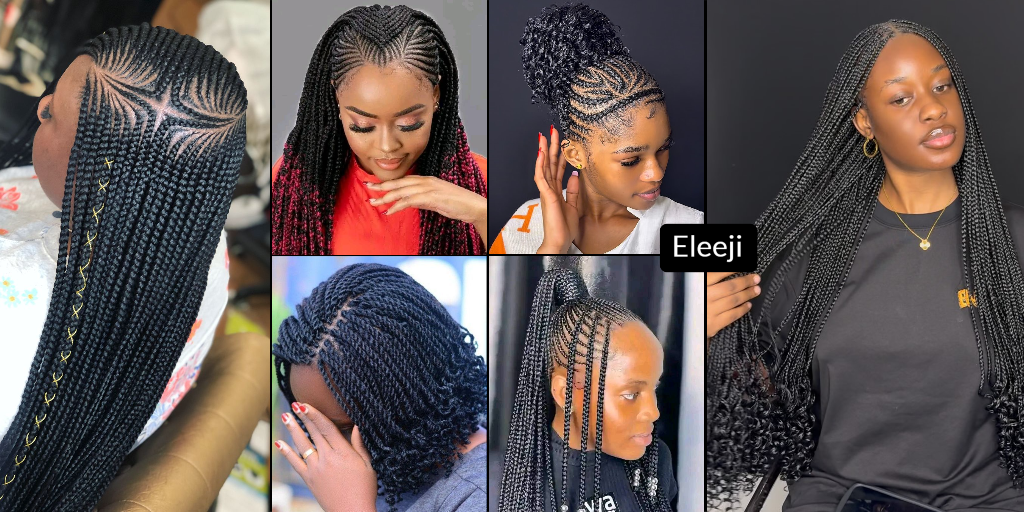
Part 1: Prepare the Base of Knotless Box Braids
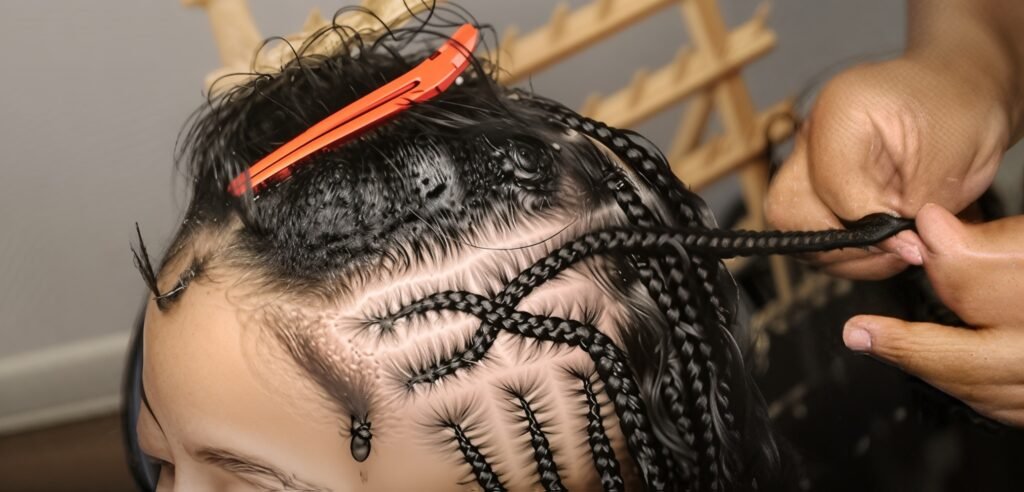
1. Starting the Knotless Braids.
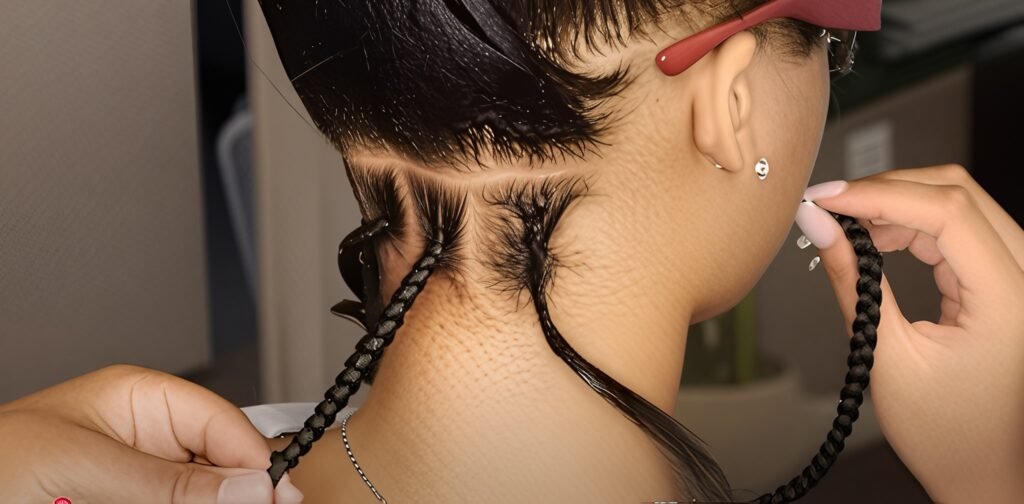
Section the hair and get the foundation down with large knotless braids.
2. Sizing Tip for Fullness:
Used large braids for the main part, Do the braids at the nape of the neck a little small. This ensures that the back part is complete this is done so that the client can wear the style half-up, half-down, and it won’t look too sparse.
3. Hair Used:
Add about six small pieces of hairs to the client’s natural hair to get the desired thickness you want.
4. Adding Curls:
Add curls throughout the back and the bottom. But first let me list the products I used.
I used 2 1/2 packs of expressions pre-stretched hair in color #1b and 1 pack of the organique deep wave
Products used
1. Shine and jam (orange container SUPREME HOLD)
2.Rat tail comb
3.Wooden rack
4.Edge booster (light green pomade)
5.Vigorol curling mousse (red)
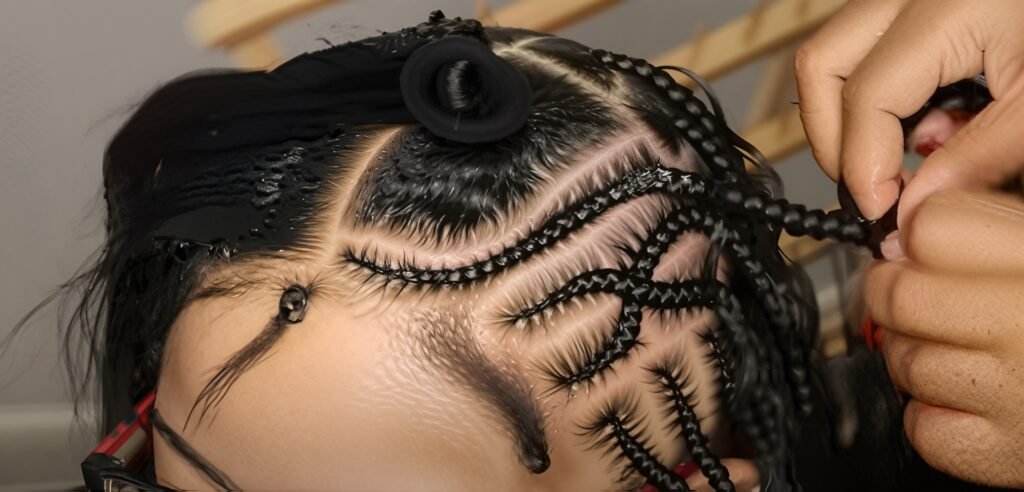
Part 2: Sectioning the Top for Feed-in Braids
This is the most crucial part of the designing process, as it dictates where your intricate feed-in patterns will go. Get this part right, and the rest is smooth.
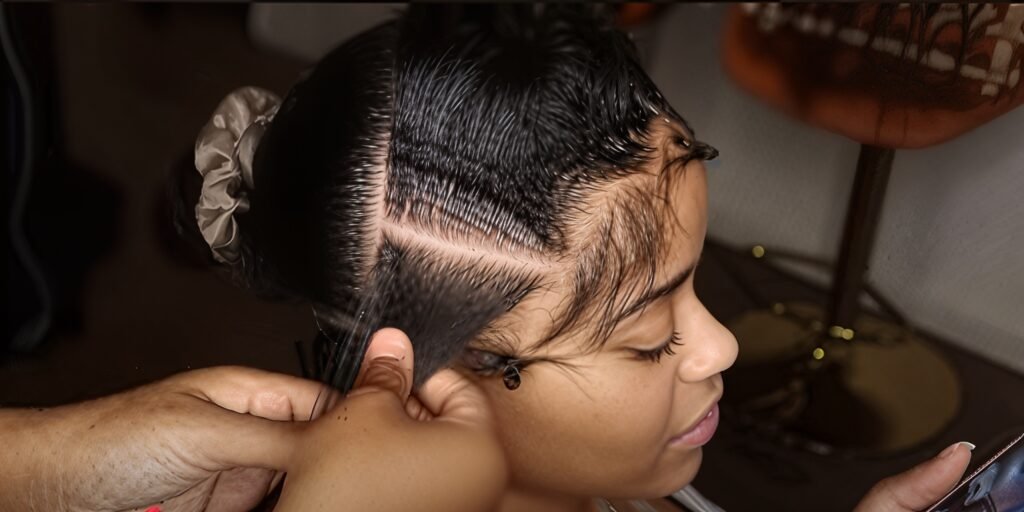
Find the Guideline:
Start with a clean middle part. Take the rat-tail comb and place it directly behind the ear, then follow a straight line all the way up and across to the other side, behind the other ear. Then creates the main divided line between the back (knotless) and the front (feed-ins).
Divide into Three Sections:
Now, on each side of the head, Divide the front design area into three smaller, key sections:
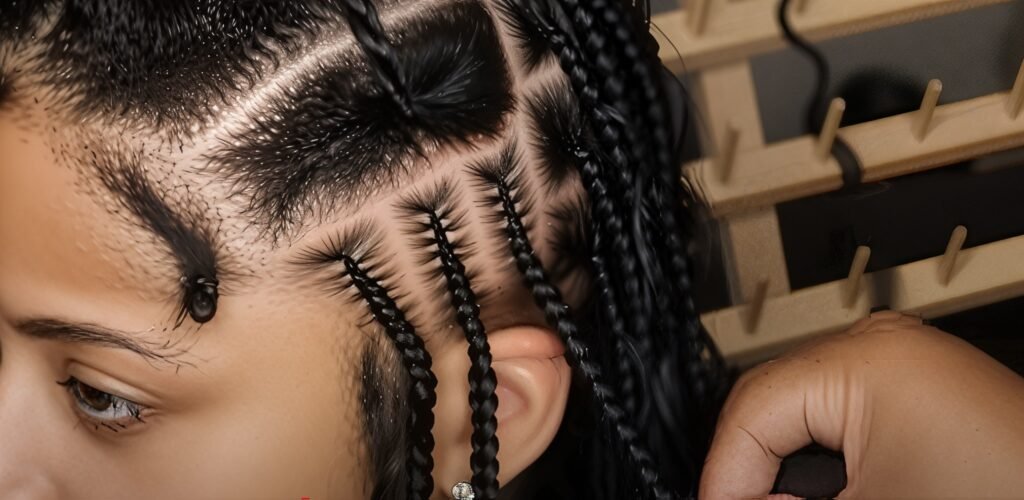
One section for the Three Straight Downs.
One section for the Crisscross (make this just a tad bit smaller).
The largest section, which will hold the Tetris Shapes and the other section where half of the other side of the food line is going to be.
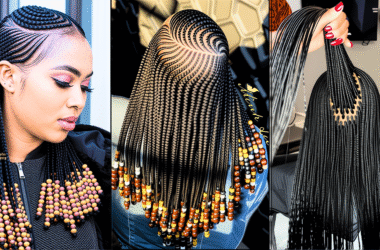
Part 3: Creating the Feed-in Designs
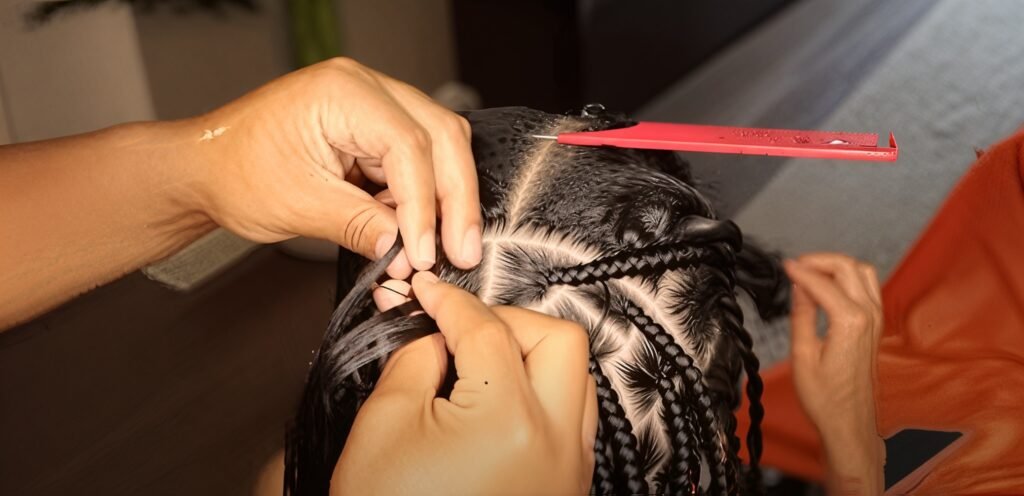
Now, when you are done with the large box braids at the back, start with the feeding braids since it is already sectioned off continue to braid.”
First Side, start doing the three straight Downs.
Now, part the crisscross and with the crisscross, divide that section into four sections and start braiding.”
After that, go ahead and make L shape for that first Tetris brush. You can decide to use any L shape form I use ‘L‘ shape rather than the round one. Add curls throughout the full lining braids as well.
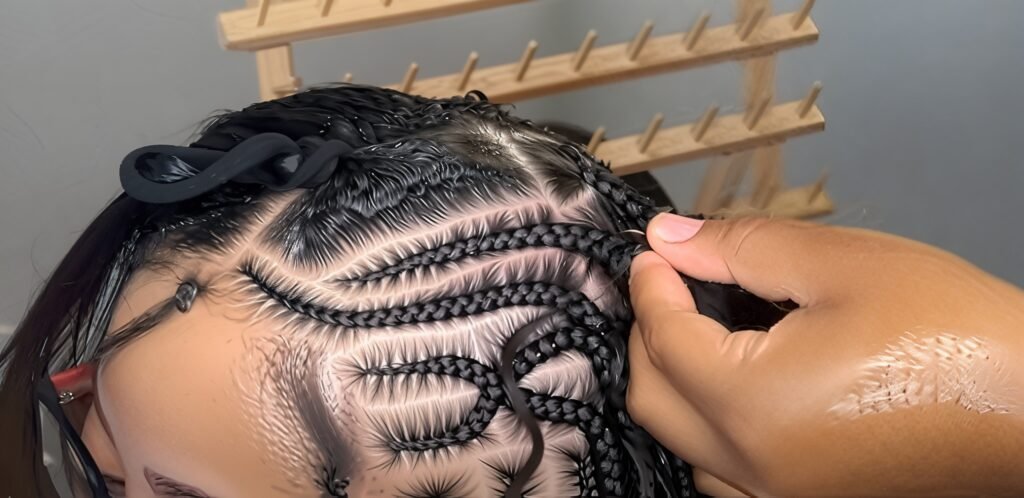
After the L shaped braid, go ahead and right next to that braid, part a straight back braid.
Second Side
After that straight back, start on with the other ‘L‘ shaped braid on the opposite side and then right after that do another straight back on that same side.
Basically, you know that whatever you do on one side you do to the other. After that do one more L shape.
A tip on how to get those stitches to really show is to divide your section in half and then Stitch one side and the other. Braid the other one side again and then the other. Repeat this and so forth as you can see those lines are definitely peeping through.”
Finishing the Middle and Second Side
Finish off the middle section by dividing it into two straight backs. And of course, what you do on one side you repeat the same on the other side.
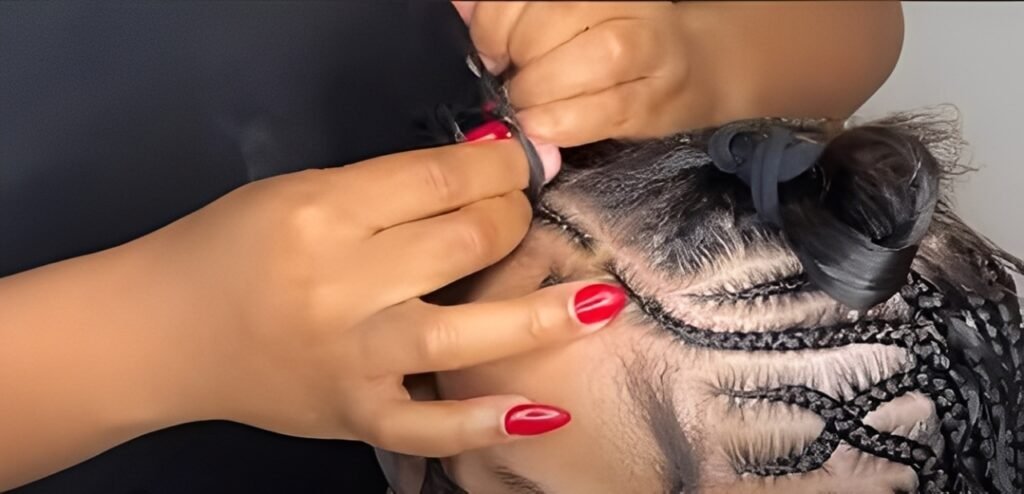
Part 4: Finishing Touches and Conclusion
You can decide to apply the braiding gel, braiding pomade, or edge control product. It makes strong to keep the braids neat and clean

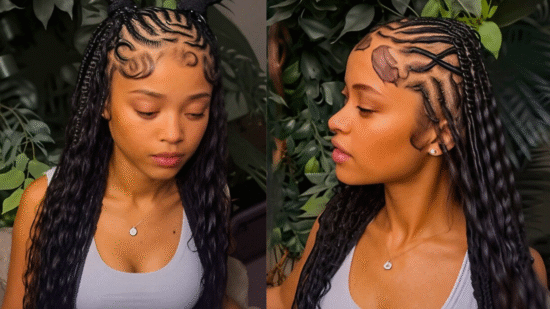
If you follow the step carefully, this is how the final finishing or the result should be. This is a beautiful Bohemian Fulani Braids. This hair can use in office, for travelling, and also, for other notable or commercial place like residential conferences.
Deep Conditioner for Your Undo Fulani Boho Braids
After you have taking off the Fulani Boho Braids which mostly last about two to three months, then this deep conditioning is the best choice for you in order to keep and maintain the hair.
Ingredients Needed
1. Vitamin E oil.
2. Tea tree oil.
3. Peppermint oil.
4. Flaxseed.
5. Coconut oil.
6. Shear butter (straight from the northern region of Ghana).
Before then, let me take you through the importance of the various ingredients of this conditioner.
Shear Butter and Coconut Oil.
They moisturize and condition the hair.
Vitamin E Oil
It has an antioxidant properties and helps with a healthy scalp.
Tea Tree Oil
It soothes itchy scalp, prevents dandruff, and improves the blood flow of the scalp.
Rice Water
It improves the hair, makes the hair thick and healthy.
Flax Seeds
It helps to make the hair healthy in general. It improves the elasticity of the hair; it binds moisture to the hair to reduce breakage, split ends, and drying.
Recipe
Cooking
Make the saucepan ready on the stove. Measure some of the Relax Seed and pour it into the saucepan. Use quarter cup to measure the flaxseed.
Add the Rice Water to the flaxseed. Soak Rice Water overnight, Use that water. Some people use normal water, but I wanted the benefits of the rice so I decided to add rice water to it.
Boil it About Five Minutes.
Five minutes later, the flaxseed should be boiled, the water around it should be consistent and thick.
Strain the liquid from the seeds to get the liquid. You will see that it’s a little bit light, but as it cools down, it will be thick, and that is what you will use for the conditioner.
Mixing To start
Put the Shear Butter in a bowl. You can measure it or use your eyes to gauge the amount
Add the Coconut Oil to it. Use one tablespoon of coconut oil. Don’t fetch the oil plenty because shear butter in itself is oily and moisturizing.
Go ahead and add the Tea Tree Oil. For the tea tree oil, add half a tablespoon.
Add the Vitamin E Oil as well. You can add one tablespoon of vitamin E oil because you put two of the half tablespoons in it.
Add your Peppermint Oil as well.
Mix all of them together to get a uniform paste. Make sure that the conditioner is as smooth as possible. If it’s not that smooth, don’t worry because when you apply it to your hair, it will definitely melt because you sit under a steaming cap or a dryer.
Now that you have gotten your uniform paste, go ahead to add the Flaxseed to the mixture. You will that it will become sticky.
Add it to the mixture; Now, go ahead and mix all of that thoroughly.
Because of the water and the oil, the mixture wouldn’t be so even. What you can do to prevent this is that you can add emulsifying wax to it just so that the water will mix well with the oil. But without the emulsifying wax, you can still use this in your hair because you are going to get all the benefits that it brings.
Conclusion
Right now, you should be done mixing, and the conditioner should be ready for use.
That is how to make All-Natural Conditioner. I really loved how it made my hair. I’ll publish another blog to show you everything, but this is how to make it.
Go ahead to apply it to the hair. One thing I love about this conditioner is that it’s very, very moisturizing, and I like the slip that the Flaxseed gives to the hair. The Rice Water also made the hair thicker.