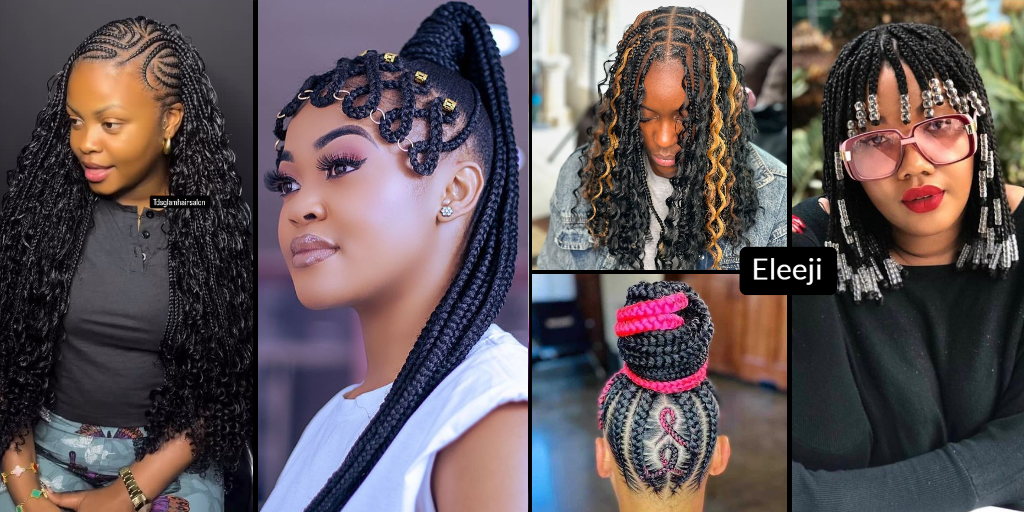

Another juicy braids idea is here for you. I will teach you a beginner-friendly, step-by-step guide on How To Get The Perfect Rope Twist. I will also help you to understand the tips of Perfect Rope Twisting in each session and the patterns in this hairstyle. All you need right now is a pen and paper to note down the important key points. A serious student who means their course will definitely do this without stress.
I will illustrate with images first after that then we jump into theory step by step for quick and easy comprehension
Products used
•Shine and jam (honey flavor)
•Rat tail comb
•Edge booster (light pink pomade)
•Nail glue to seal curly ends
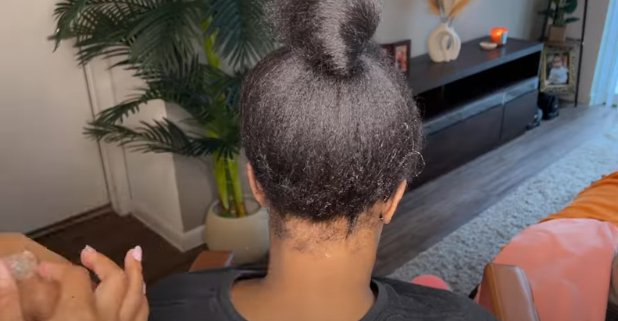
This is stage of the hair before everything will start. This is the the natural hair with products application neither an extension just at the row stage
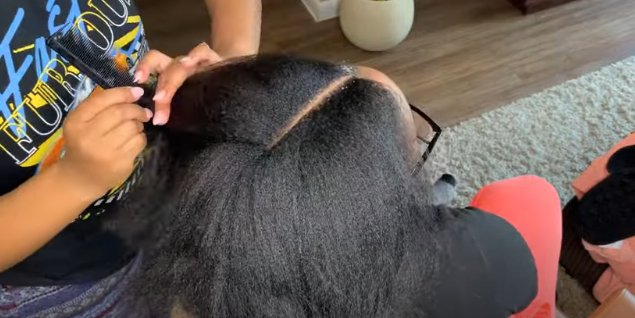
I comb it to make it the strands straight and also to make it medium soft for easy penetration. At this stage, I use the comb to part the hair into two sections by creating indentation in between the the hair scalp.
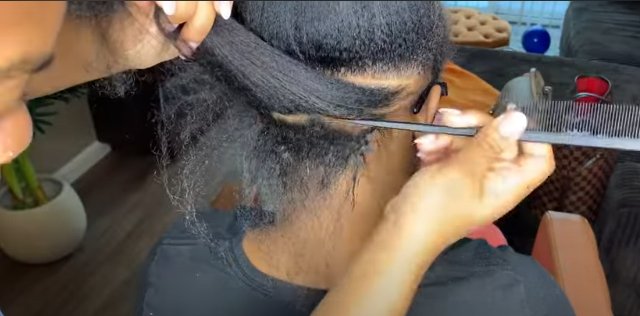
I use Rat-Tail to make a required division into it. This is where you need to be creative during the partition based on the kind of designs you want.
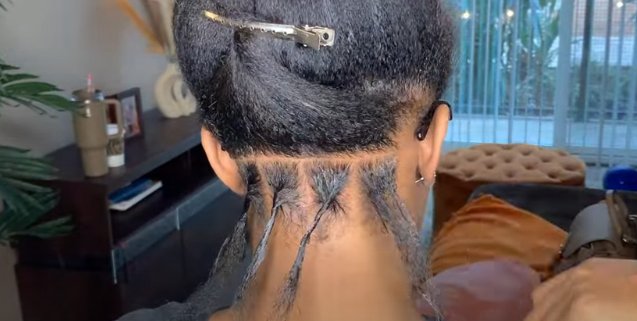
After the necessary products are applied after washing and drying, then you can now begin with the twist or braiding.
Now a while back, I published three ways to start a twist, and this will be the third method which is a Rope Twist. This will be twisted from the beginning of the root all the way to the bottom. It’s not starting with a braid nor lock.
I decided, why not give a blog of me doing some actual Rope Twists and give you a few little tips and pointers on how you can perfect it. If you’re like me, who probably struggle with this method most, then I promise you, once you start getting the hang of this method, it’s as easy as pie and it actually becomes fun to do. So, make sure you access your learning equipment, like your notepad or pen and paper.
Part 1: The Rope Twisting
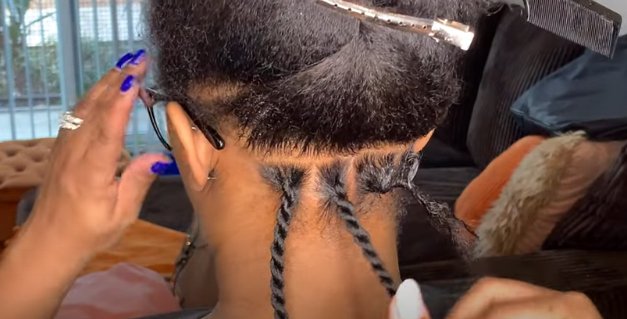
This is where the extension is needed. What is hair extension? Hair extension is any secondary jewelry or fiber attachment to the hair by adding values that altered from original to retouched for aesthetic looks. The Rope Twisting is the process by adding rope counterclockwise bit by bit using the method called Twist or Twisting.
Preparing the Hair
Divide your part down in the middle and place the braiding hair right in between that space.
The Initial Twist
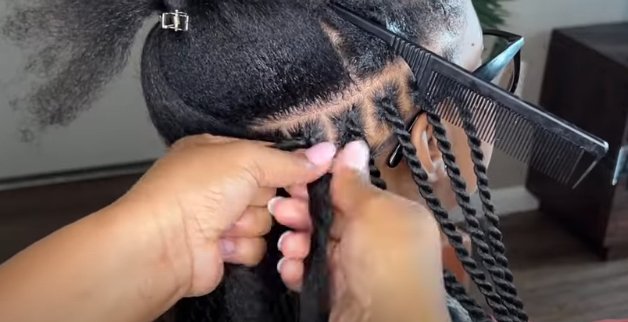
Starting with the left strand, make sure you grab that hair as firmly as possible and twist it counterclockwise about five times. Then, take the other side, grab the right side firmly, and twist that side counterclockwise as well, about four or five times, or until it’s tight.
After that, you’re going to twist the two resulting strands together. As you’re twisting, don’t forget to twist the strands individually as you go. This is to ensure that the final twist won’t unravel and will be fully secure. Also add another strand towards the middle of the braid to ensure that the twist is full from the root all the way to the bottom.
Essential Tips and Common Mistakes
Tip 1: The Firm Grip
The number one tip to getting a secure twist at the root is to make sure you have all the hair pulled and held firmly.
Here again, you see how I’m grabbing her hair and making sure it goes around about five times counterclockwise, and the same thing with the right side. Once you make sure the grip is firm, the twist turns out super secure, nice, and polished. It lasts your client a while and won’t be lumpy or bumpy.
You should understand how I’m taking the real strand of hair, twisting it, and making sure it’s being twisted within the synthetic hair. When I take that other side, I am pulling it and making sure it is wrapped around that synthetic hair so that I know that when I twist it, it’s going to be secure to the root. You’re not going to have any bumps, lumps, or flyaways.
Common Mistake:
Loose Grip
On this second strand, the right strand, I didn’t grab that firmly enough. When I twist it, you are going to see that it turns out to be a very loose root. I didn’t like that at all, so make sure you are grabbing it as firmly as you can not too tight, but firm.
Tip 2: Hand Placement
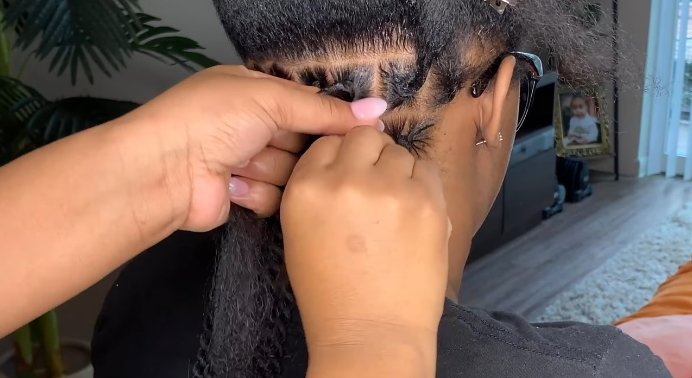
Another pointer is hand placement. You want to make sure you are always holding the synthetic hair in the right place so that the method is easier for you.
You see my right hand: the back part of my right hand is holding that right strand and the synthetic hair so that I can use my thumb to help me to twist counterclockwise. Then, you want to make sure that you see my left hand: it’s holding that left strand in place as well.
Due to this, you want to make sure you’re holding the separate strands out of the way as you’re twisting each section counterclockwise. That’s also a big part in making this method as easy as possible.
Part 3: Sizing and Sealing the Ends
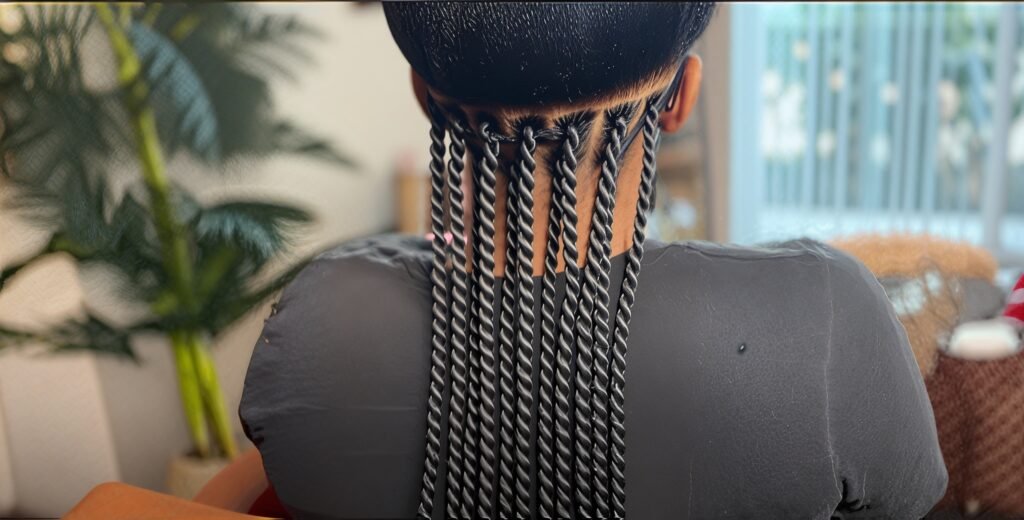
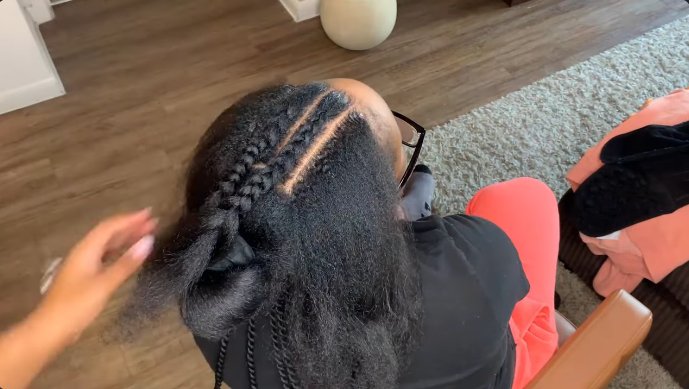
Client Preparation and Parting. Remember I said earlier that during the parting, it depend on the kind of result you want. In this case, my client is getting medium-sized parts about 11 parts across as in the image above. Honestly, when it comes to rope twists, make the parts as small as you can because the bigger the parts, they won’t last.
Twisting and Security
This is how the back part of the first section looks. Add some curls to the bottom, so you’ll see those at the end.
And like I said, once you twist your strands down, it shouldn’t unravel. But just for the security and to be on the safe side, go ahead and add that little braids at the bottom. It will be secure after it is dipped. Burn the ends, after that it will be solid. Now you have a strong twist curl.
Adding curls to the end of the hair is recommended because a twists braids without any curls at the bottom, is a mini braid.
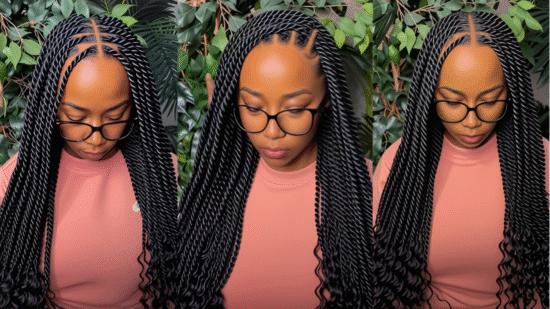
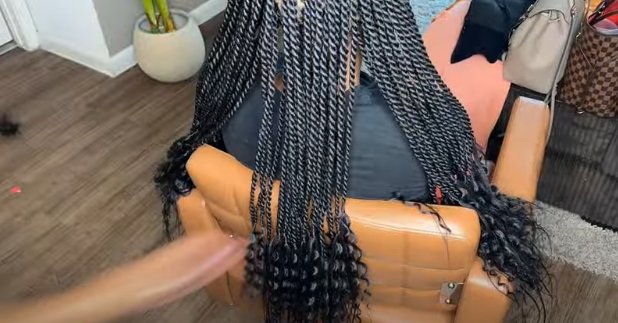
Final Rope Twist
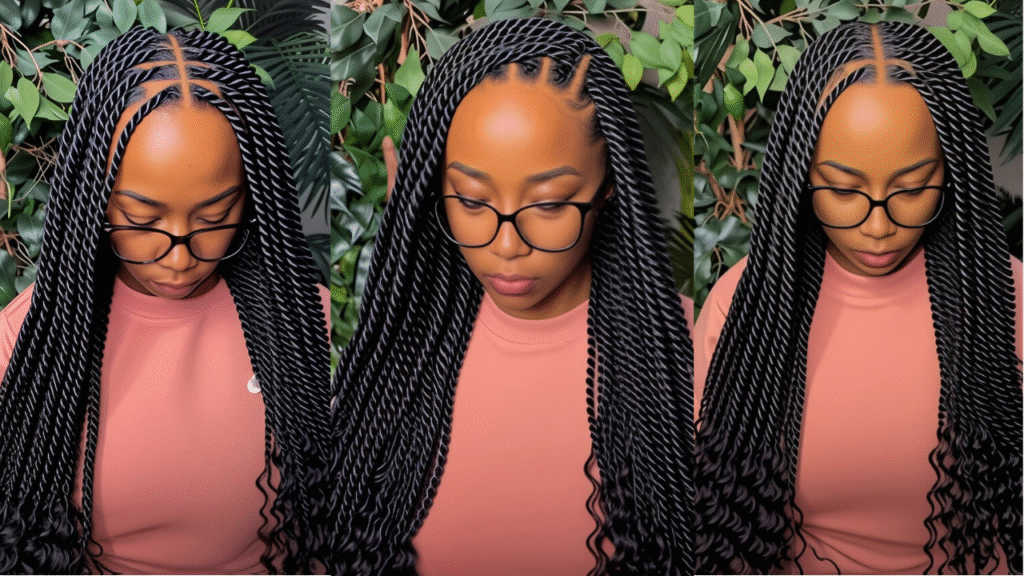
Here is our final Rope Twist. This beautiful hair braids can be used to any occasion of your preference due to it uniqueness. It is cute, fantastic and gorgeous. Most of the USA ladies are fun of this Rope Twist.
Summary and Conclusion
These are the three main tips that you can use on how to just perfect your rope twist. The first one, make sure you grab your the hair as firmly as possible. Second one, make sure you twist the rope twist strands as you go and the third one, keep your hand placements in the right order so that you keep each strand out of the way.
How To Clean Your Rope Twist
I show you how to clean your hair without necessarily having to wash it under running water.
Why Clean Rope Twist Without Rinsing?
Sometimes when you braid your hair, you need to clean your hair frequently and regularly because of:
Product buildup from moisturizing and sealing.
Dandruff, which requires a clean scalp to allow the scalp to breathe.
I love the feedback I got from my Instagram Eleeji page on the dandruff and itchy scalp mixture, and that has motivated me to do this blog for you.
This is a very quick and easy method for us because it takes a very long time to dry when you wash your braids under running water, and it is sometimes stressful. We are going to clean our hair, but we are not going to rinse it under running water.
How To Dry Clean Your Scalp
Supplies Needed
A shampoo of your choice.
A bowl or a cup.
A towel.
Water.
Step-by-Step Cleaning
First, Pour a little bit of the shampoo into the bowl. Dilute it with water, and then cleaning scalp.
Start of Procedure
This is how my scalp looks before starting to clean it. You can see the dandruff in my hair; it’s so much.
Cleaning With Diluted Shampoo
I use the towel and dip it into diluted shampoo.
Start cleaning the scalp right away. Firstly, do it section by section to make sure that every part of the hair is well cleaned. We want to get all the dandruff out before applying anything else to our hair.
Itchy Scalp Mixture
Some people ask questions about when to apply the DIY mixture for itchy scalp and dandruff. Some people had concerns about the smell of the Apple Cider Vinegar.
To mask the smell of the Apple Cider Vinegar, you can put essential oils in it. You can add Lavender, Lemon, Rose, or any essential oil of your choice, and that will mask the smell of the Apple Cider Vinegar.
As to when to apply it to your hair, you can either do it before you clean the scalp or you can do it after the scalp is cleaned. It all depends on how you are able to tolerate the smell.
For me, I prefer applying it on a clean scalp after I have cleaned my scalp. I also clean my scalp every week so that the smell doesn’t disturb me or anyone around me.
Cleaning and Conditioning
After pour the fresh water, rinse the towel, clean the hair with the clean towel.
Just as we apply conditioner after shampooing the hair, apply the conditioner here too. Use ORS replenishing conditioner, but you can use any conditioner of your choice.
Put all the conditioner into a bowl, dilute it with water, and apply it onto the scalp just to replenish the moisture in the hair and give it that fresh feel.
Final Result
At this stage, the scalp will be looking beautiful fresh. Almost all the dandruff is gone.
Apply the anti-itch spray afterwards, that will to take care of any other dandruff that would want to surface. When that is well done, you will see a fresh clean hair scalp with good smell.
Moisturize the scalp and seal it with oil. That would be the best thing to do afterwards if you are someone who doesn’t have dandruff in your hair.
This is how to clean scalp without necessarily having to wash it under running water. This is a very quick and easy method I have tried myself. Clean your braids anytime you have one because it easy, quick and costless.